
Star Nativity Shadow Box Tutorial

Project Description
Make a stunning shadow box featuring the classic Nativity silhouetted against the Bethlehem sky. This projects uses paper and mid-level construction techniques to assemble the 11" tall x 4" deep shadow box. It includes 4 internal layers and space in the back for optional LED tea lights to provide a back glow in the sky. It is perfect for mantle, shelf or hall table Christmas decor. It also can be place on a wide window sill and be illuminated by sun light.
Update 1/26/2018: I have just uploaded a video tutorial of this project. Read steps 1-5 below and then link through to the tutorial.
Download cutting file here:

Supplies Needed:

Cutting File available from 3dcuts.com here.
12 x 12" card stock 5 pieces needed for star frame
8.5 x 11" card stock - 3 pieces needed to match star frame. 3 additional pieces for internal layers. I used the 65lb Cardstock from Recollections.
12 x 12" vellum- 1 sheet
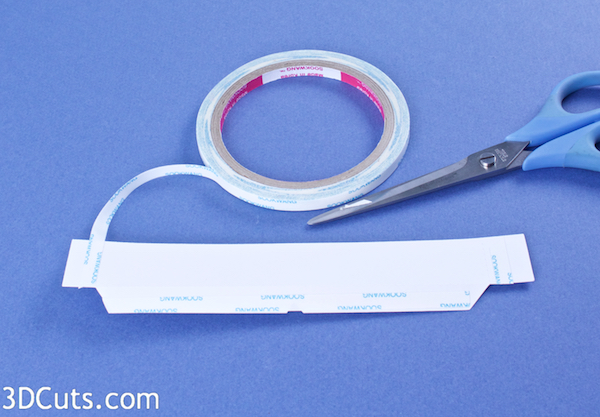
Adhesive - I used Scor-Tape (1/4 and 1/2")
Foam 3D dots
2 LED tea Lights (optional)
Parts Sizes: (need for dxf files)
Star Nativity Back 11.4365" w X 10.812" h
Star Nativity Layer 1 - 8.3374"w X 8.0564" h
Star Nativity Layer 2 - 8.3374" w x 8.6982" h
Star Nativity Layer 3 - 8.3374" w x 5.9522" h
Star Nativity Small Parts grouped - 10.9679"w x 11.7187" h
Star Nativity Fame Front - 11.3377"w x 10.7187" h
Star Nativity Vellum Holder - 11.7364"w x 11.7579" h
Star Nativity Vellum Layer - 10.7899" w x 10.2092" h
Star Nativity VellumHolder (smaller) - 11.3852" w x 11.4517"h
Steps for Completing the Nativity Shadow Box
1. Download the cutting files for your cutting machine from the 3dcuts.com store. Link here.
2. Load the files into your cutting software following the steps for your cutting machine.
3. Prepare the files:.

For the Silhouette: The SVG files from this site will need to be turned into cutting files. Click here for detailed steps on how to use SVG files on your Silhouette. http://www.3dcuts.com/tutorial-upload-svg-silhouette
For the Silhouette files from the Silhouette online design store: This download comes in one long file with cut lines already enabled. You will need to ungroup the file and then copy and paste the parts into separate page sized files to cut. All the text instructions are non cutting items.
For Cricut Explore: Here is a guide for importing into Cricut Design Space. http://www.3dcuts.com/tutorial-adding-3dcuts-files-to-cricut,
Note: There is an extra svg file in the set titled Vellum Holder Smal.svg. This file is for those with cutters that can't cut over 11.5". The Vellum Holder is 11.7 inches and the Cricut and brother Scan'n'cut might have trouble. If so cut the small option. (This was added 11/29. Email me if you need this file.)
4. Cut the files.
Note to Silhouette users - The Silhouette sometimes has issues with vertical dotted lines and cuts them in a slow fashion. If you position the pieces so the major dotted lines are horizontal, it might cut much faster.
The grass layer has fine lines. It is best to have a good blade and mat and to slow down the speed for this layer.
Below is a diagram of all the parts, their name and how many to cut of each.
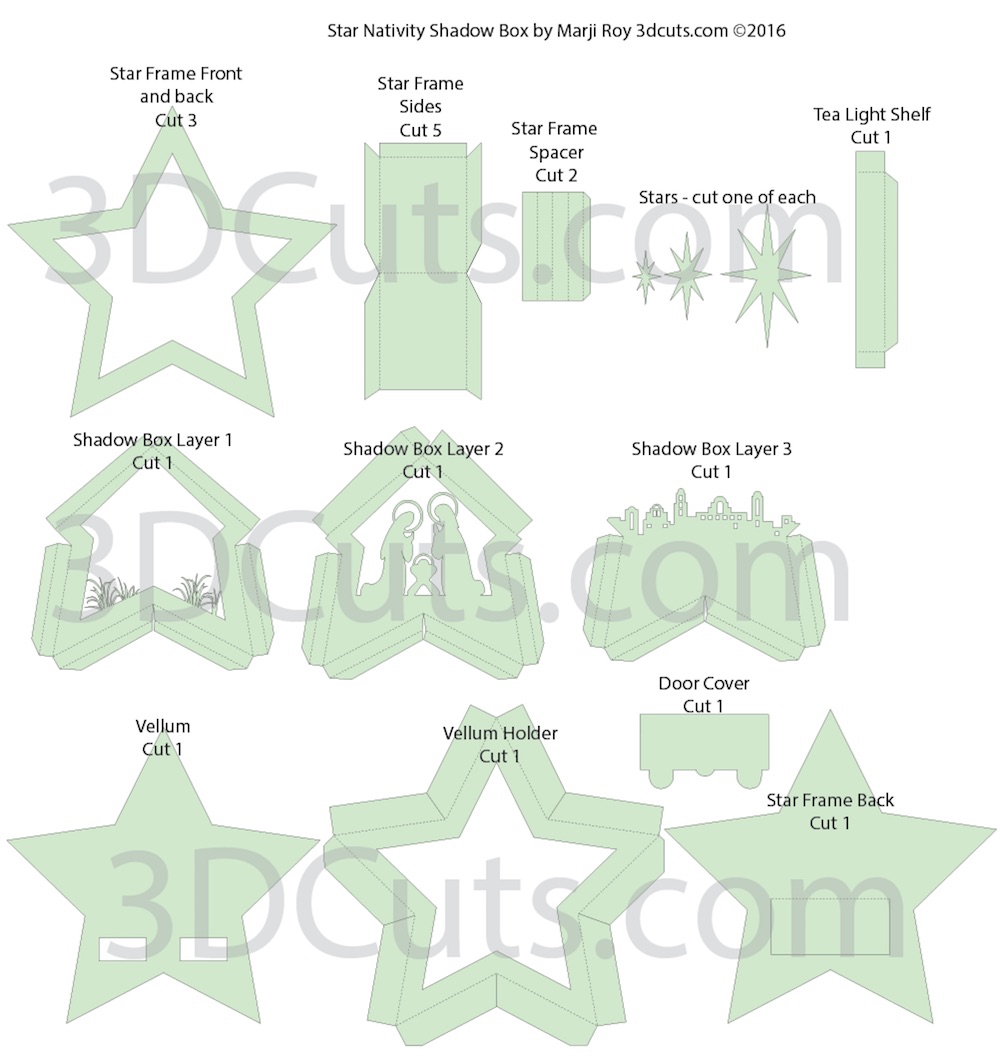
Now that the parts are cut you can choose to watch the video tutorial for assembly or use the photos below.
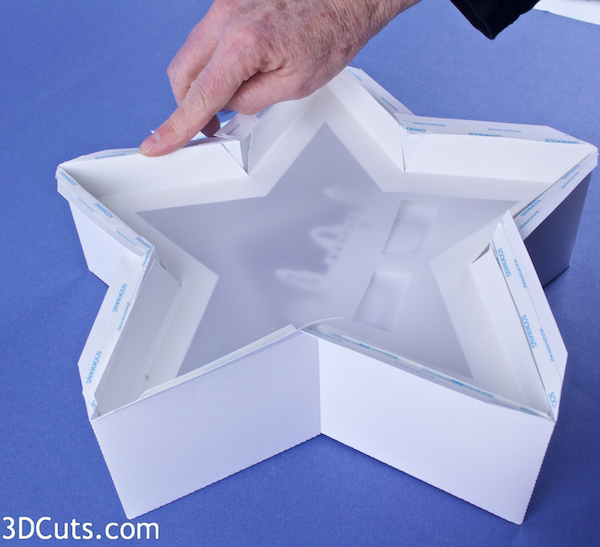
5. Build the star frame:
Identify the 5 star side pieces.
Fold on all the dotted fold lines. The fours side tabs all get folded inward and the one end tab gets folded outward.


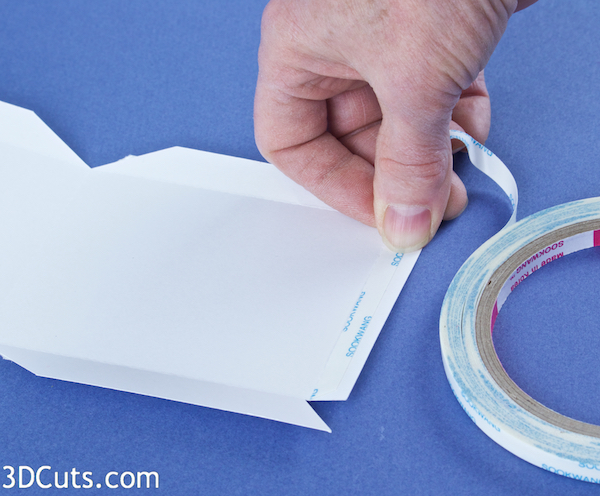
Apply Scor-Ape to the inside of the four side tabs. Leave all the backing on the Scor-Tape,
Turn the piece over and apply Scor-Tape to the other side of the one end tab.
Repeat on all five side pieces.


Peel the backing off one tab on a side piece. Leave the backing on the other side.
You will adhere the side piece to one of the hollow-center stars.
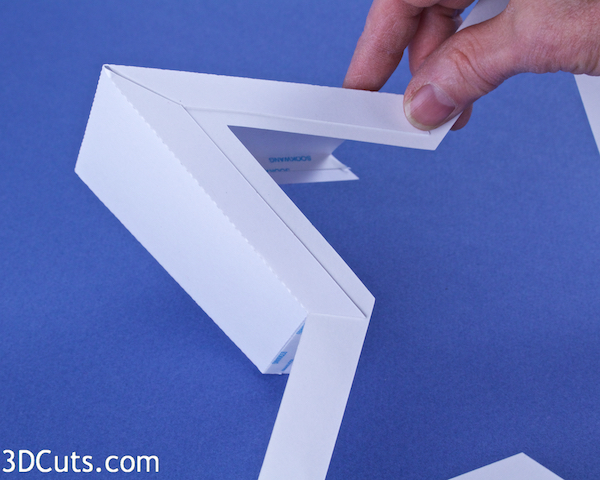
Start at the star point and line that up with the dotted center fold of the side piece then line up the edge. The tab goes on the outside of the star frame. Work to keep the edge of the star perfectly aligned with the fold line of the side piece.
Fold the side piece down the other side of the point, remove the backing tape and adhere in place.


This is a view of what the front side of the star should look like after adhering the first side.

Peel the backing tape off the end tab and place the next side piece over the end tab and adhere in place. Be sure to line the end of the new side up to the dotted fold line of the end tab.
Peel the back off the Scor-Tape of the side piece just attached and attach it to the side of the next star point working to have the center fold line up with the next point.
Remove the Scor-Tape from the other edge and attach that side as well.

Continue around the star adding each edge piece to the previous one and adhere to the edge.
When you get to the end adhere the last tab to the first edge making the star edge complete all around the star piece.

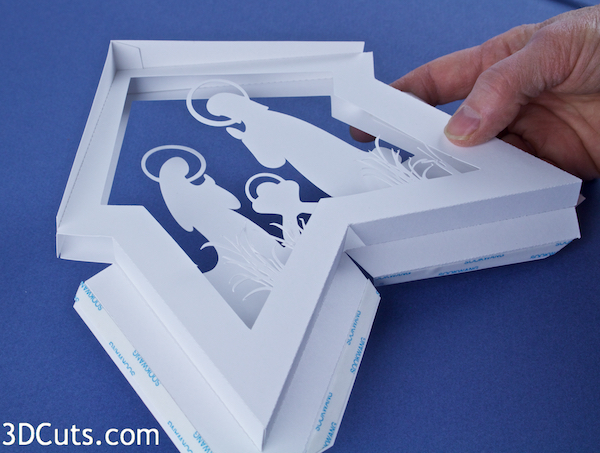
Construct the front star frame braces. The purpose of these pieces is to provide spacing for the first layer of the shadow box. They get inserted into the front corners of the star frame.
There are two. Fold them on the four dotted fold lines.
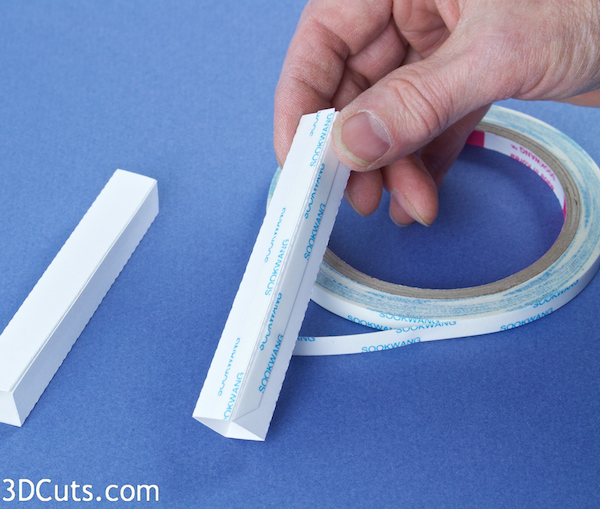
Apply Scor-tape to the outside of the long tab. The tab is the edge with the angles.

Peel the Scor-Tape backing and adhere the tab inside the other end of the same piece creating a hollow square rod.
Make two of these.
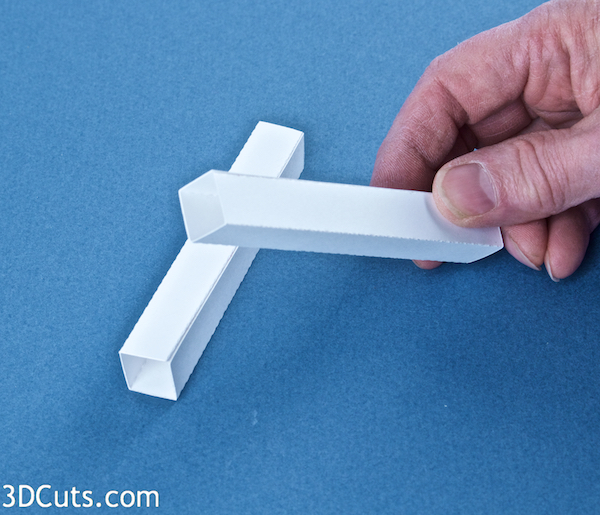
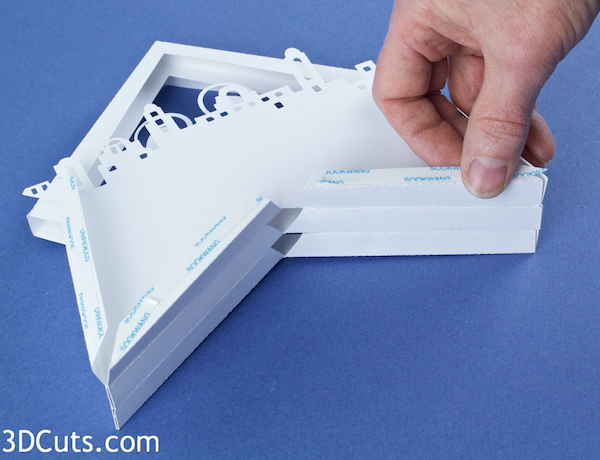
Apply Scor-Tape to two sides of one corner of the square rod.
Peel off the backing and adhere these rods into the front corners of the star shadow box as shown. These two corners will be the bottom two points of the finished shadow box.
They should be up tight against the front frame.
The star is still fairly floppy at this point. Don't worry. Later steps will make it more rigid.

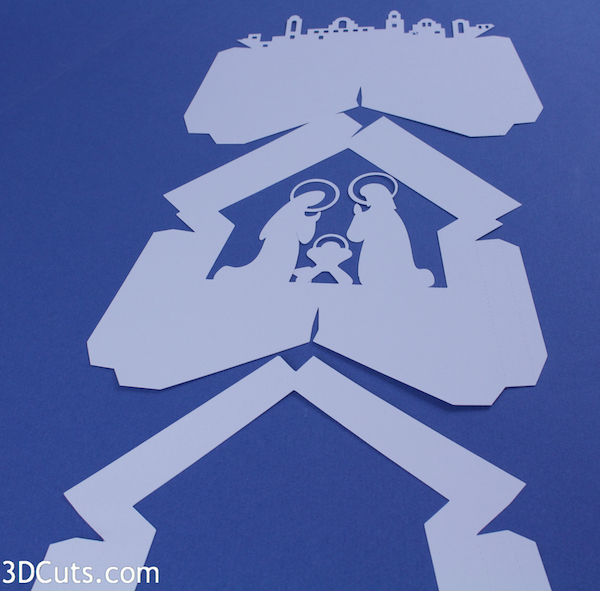
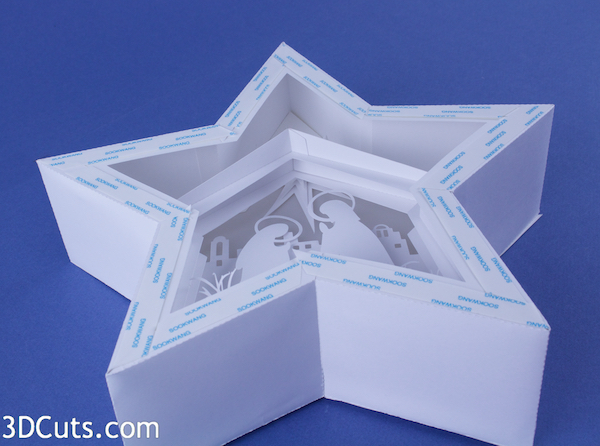
6. Make the inner layers of the shadow box. There are 4 inner layers of the Nativity.
Layer 1 is the grass layer
Layer 2 is Mary, Joseph and Jesus
Layer 3 is the Bethlehem buildings.
Layer 4 will be vellum with the star.
These will each be folded and then adhered together outside the star frame. Once the complete inner unit of layers is together you will slide it into the star frame.
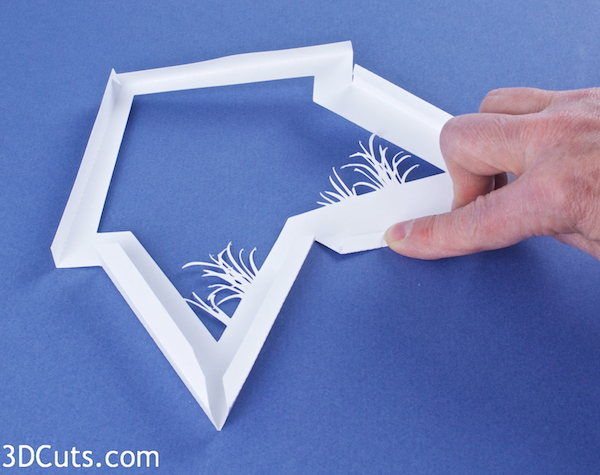
Fold all the tabs on the grass layer in the same direction. There are 6 sets, 4 are of two folds each, and the top 2 are 1 fold each.
Apply Scor-Tape to the outside of the last tab on each of the six edges.

Fold the top two tabs of Layer 2 forward. This will form the stable roof. Do not put Scor-Tape on these tabs. (left image)
Fold the bottom edges to the back along both fold lines. Add Scor-Tape to the last part of all four of these bottom tabs.
Add Scor-tape to the tiny tab between the two roof panels in the top center.


Peel the backing off the score-tape in the roof center and adhere it to the other roof panel forming the stable top. It will come forward over the Holy Family.
Prepare Layer 3 by folding all the fold lines toward the back and adding Scor-Tape to the outside of the last tab on all four side as shown.

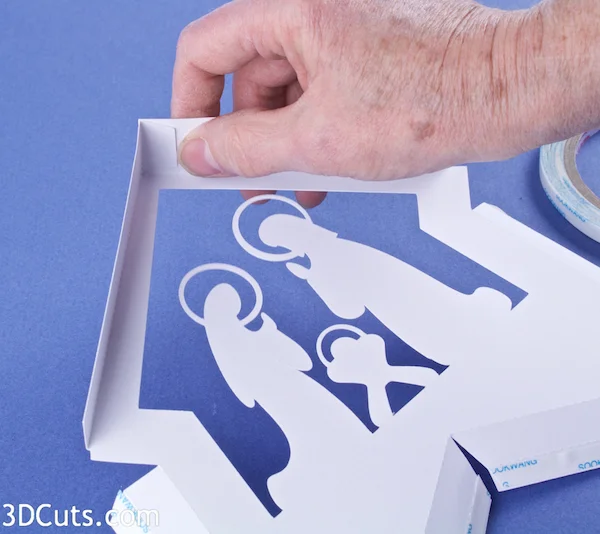
Adhere layer 1 (grasses) to Layer 2 (Holy Family).
Peel the Scor-Tape from the 2 top edges of the grasses layer. Those get positioned inside the roof of Layer two. You want to carefully place layer one so the peak fits right into the peak of the roof. Press the two top pieces in place.

The side tab of Layer 1 will fold back and get adhered to the front of Layer 2. The sides will position Layer 1 to be about 1/2" in front of Layer 2.
Peel the backing off the Scor-Tape on one side, position so the bottom tips and side edges line up and press in place.

Adhere all four edges of Layer 1 to Layer 2 in the same way. Peel the backing tape, carefully position and press to adhere.
Each of the bottom points will have two edges to adhere.
The tips of the points should meet up and the valley in the middle of the base will have a gap.
Adhere the combined Layers 1 and 2 to Layer 3 (buildings) using the same technique along the bottom 4 edges.
Carefully position the piece, peel the backing tape and press into place.
All the tips should align and there should again be a gap in the center valley.
Construct Layer 4 - the vellum layer. The vellum star will be adhered to the inside of layer four- the vellum holder. It is smaller and will fit inside the dotted star line.

Apply Scor-Tape to all edges of the vellum star. This gets placed right along the edge. Peel the tape backing and adhere the vellum to the vellum holder.

The side that you adhered the vellum to will be the back side. Fold all the edge tabs back on the dotted fold lines.

Add 3D foam dots to the stars. Add two 1/2" size to the back of the largest star.
Add two 1/4" sized to the back of the middle star.
Add one 1/4" size to the back of the littlest star.

Adhere the littlest start to the middle of the medium star.
Adhere the medium start to the middle of the big star.

Adhere the star to the top center of the front of the vellum layer. The two openings in the vellum will be on the bottom. The front does not show the vellum edges.
Be sure the tips of the star are inside the fold lines of the vellum layer.

Adhere the stack of layers 1-3 to the front of layer 4.

Peel the backing off the Scor-Tape one leg at a time and position the stack in place. Start by lining up the bottom points. The edges will meet at the points and there will be a gap in the valley.
Adhere all edges of layer 3 to 4.

Add two strips of adhesive to all of the tabs on the vellum layer. I used strips of 1/2" Scor-Tape. Leave the backing on.

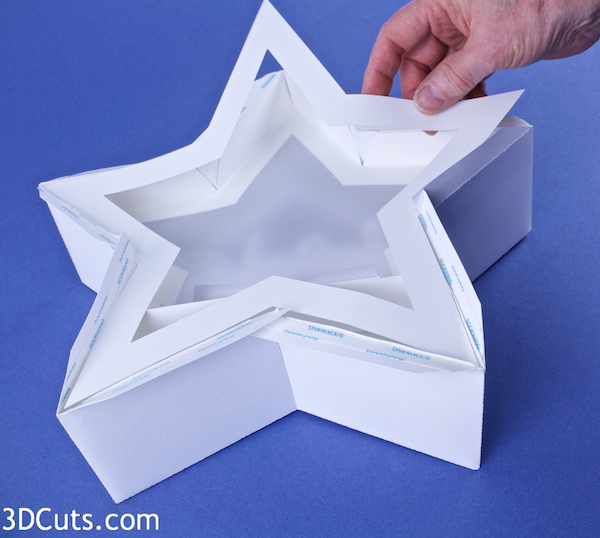
7. Insert the stack of layers into the star frame.
Slide the stack of layers into the star frame. Work to line up the tips of the points.
Make sure the bottom of the inside layers is aligned with the bottom of the star frame. Remember the bottom of the star frame has the two frame spacers in the corners.
Slide the inner layers all the way to the front so the grass layer rests up against the spacing rods in the front.
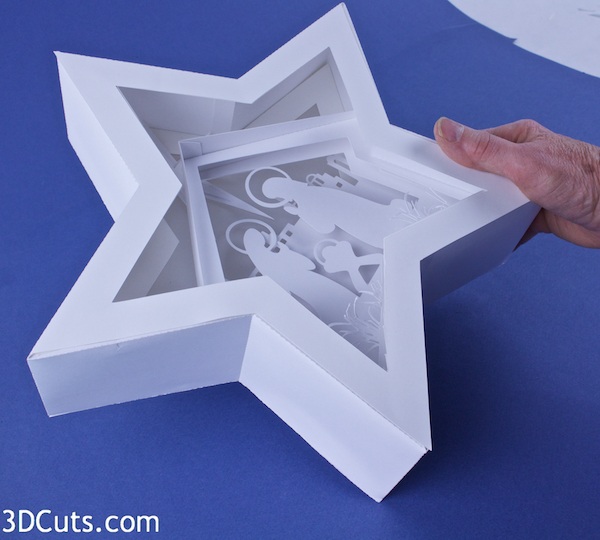
When the inner stack is correctly positioned, the tabs of the vellum layer should align with the back edge (right photo). Trim them if they extend out.

Adhere the inside stack to the star frame by removing the Scor-Tape backing strips. Remove them one by one being careful to align the tab edge with the back of the star and keep the layers square.
Keep the tips of the star layers aligned.
I used tweezers to reach in and grab the Scor-tape backing.

8. Tea LIght Shelf
Insert the tea light shelf. This step is optional. Only add it if you are going to put LED tea lights in the shadow box.
Apple Scor-Tape to all 3 tabs on the shelf.
Fold on all dotted fold lines.
The tea light shelf gets positioned inside the back. It extends from side to side and rests right in line with the bottom of the two holes in the vellum layer.
The bottom of the long tab should also be resting on the inside edge of the star frame.
Peel the backing of the Scor-tape and adhere the shelf in place.

9. Finish the back
The star frame back brace gets installed next.
Position it inside all the tabs of the star frame.
Peel the Scor-Tape backing off of each strip, one at a time and position it and adhere it in place. The tabs fold down on top of the the star brace.
Work to keep the star frame even.
Adhere all points in place.


The back door panel gets adhered. Adhere the cover to the panel on the back star. Align the top of the cover to the dotted fold line on the back. (Note - I redesigned the cover after these photos were taken. It looks different but goes on the same way.)
Adhere the star back to the shadow box.
The star back will stiffen the star frame plus cover all the visible tabs.
Apply Scor-Tape to the tabs. I used the 1/2" Scor-Tape here.

The star frame back should fit the star. Position it paying attention to top and bottom. The door should be near the the tea light shelf.
Peel the adhesive backing from the scor-tape and working carefully, one side at a time, adhere the back in place. You want to avoid creating puckers in the back.

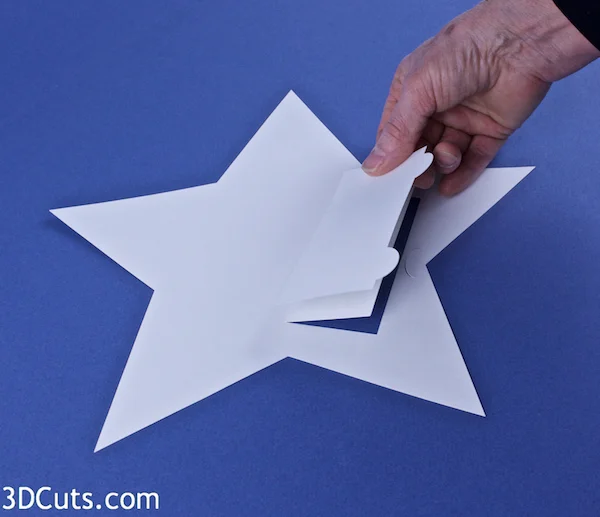
10. Finish the front
The last open-centered star is a cover for the front of the shadow box. Add Scor-Tape to all tabs on the front.
Carefully position the star on the front and remove one section of backing tape at a time. Proceed with care to keep the front star flat and not puckered.

The shadow box is complete.
Insert LED tea lights in the back. They slide into the slots in the vellum layer. (Use only LED tea lights.)

Think about how to display your shadow box. Here I have it on a console table. It would also look great as part of a mantle vignette. Merry Christmas to all!


