
Tutorial – Importing 3DCuts.com Files into Cricut Design Space
Some hints for Cricut users:
Filled shapes: SVG files with unfilled shapes are imported into Design Space filled in black, which often hides other layers or details. New files have shapes filled with white so details are visible.
Dotted fold lines. Files show all fold lines as dotted lines.
Attach: Remember to select all and ATTACH before yo go to cut. This will keep add-ons like dotted fold lines in place.
Step-bystep Instructions for importing:
1. Purchase and download a file from 3dcuts.com here.
You can download the file right from the link in the confirmation notice you receive after placing the order, or from the link in the follow-up email. The link is good for 24 hours so be sure to download right after purchase.
2. Zip file: The download will place a zip file on your computer in the designated download location.
This is a personal computer setting and you need to know how your computer handles downloads. It may be a file on your desktop, or there may be a downloads folder. Your computer may be set to automatically unzip the zipped file or you might have to double click on it for it to unzip. Once it is unzipped you will see a folder with additional folders or files inside. If you are working on a tablet you will need an app to unzip the folder.
3. Import: The files that are .SVG files can be imported into Design Space software to work on your Cricut. Do not just open them.
Note: If you do not see any svg files - but instead see a group of html files, you have to adjust settings. Your computer is set to see certain imported svg files as chrome files and you need to change your computer settings to make it recognize them as svg files. Here is an article on how to change it: https://www.silhouetteschoolblog.com/2021/05/how-to-stop-svg-opening-in-internet.html?fbclid=IwAR0-qzSIFHFy_fwPoXUDLveTDAGRoPjvjf0D0K-S6QKGKY2paufQJJJoI4Q

4. Launch the Design Space software in your web browser. https://www.cricut.com/design and log in. You will need a Design Space account (free) to save files there.
5. From the splash screen click on New Project button.

6. Click on Upload Image in the left margin.

7. Click on Upload Image in the Upload Image screen. (.SVG files are Vector files)
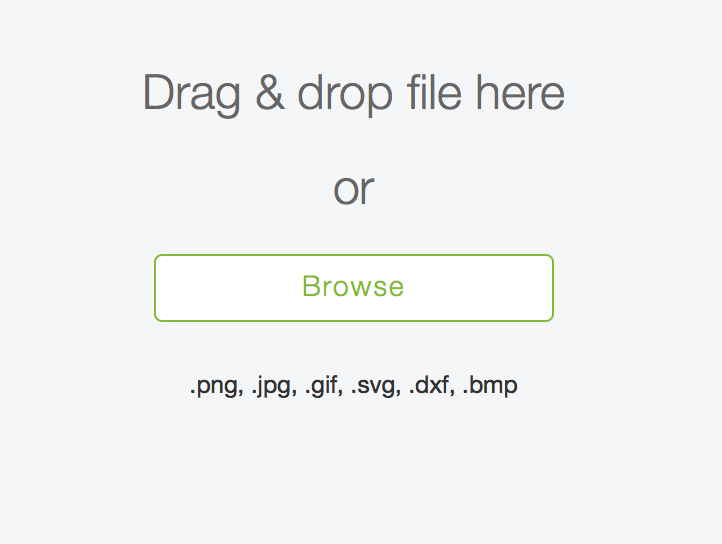
8. Click on Browse and navigated to the location of the downloaded (and unzipped) file.
Give the file appropriate names and tags

9. Click Save Iimage - button in lower right.

10. It will now appear in the Uploaded images area of the screen. Hover over it and click it to select it. It will have a greenborder once it is selected. You can upload all .SVG cutting files needed for this project now or as you need them. You can select them all and insert them into the work space together or individually. Once you have your choice selected, click on insert images button in the lower right.
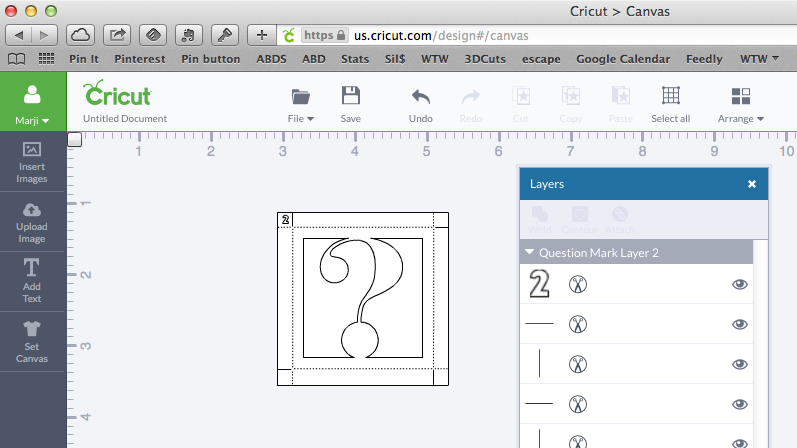
11. The cutting file image will appear in the work space. If you uploaded multiples, they will be stacked on top of each other and you will need to click and slide them to new spaces to see all.
To proceed you may need to ungroup a design, change the fill color (especially if it opens all black) or assigning line types (cut or score).
If your parts move around when you try to cut- attach them. This is different from group or weld.