
Star Shadow Box - Heart Tree Tutorial - with Videos

Project Description
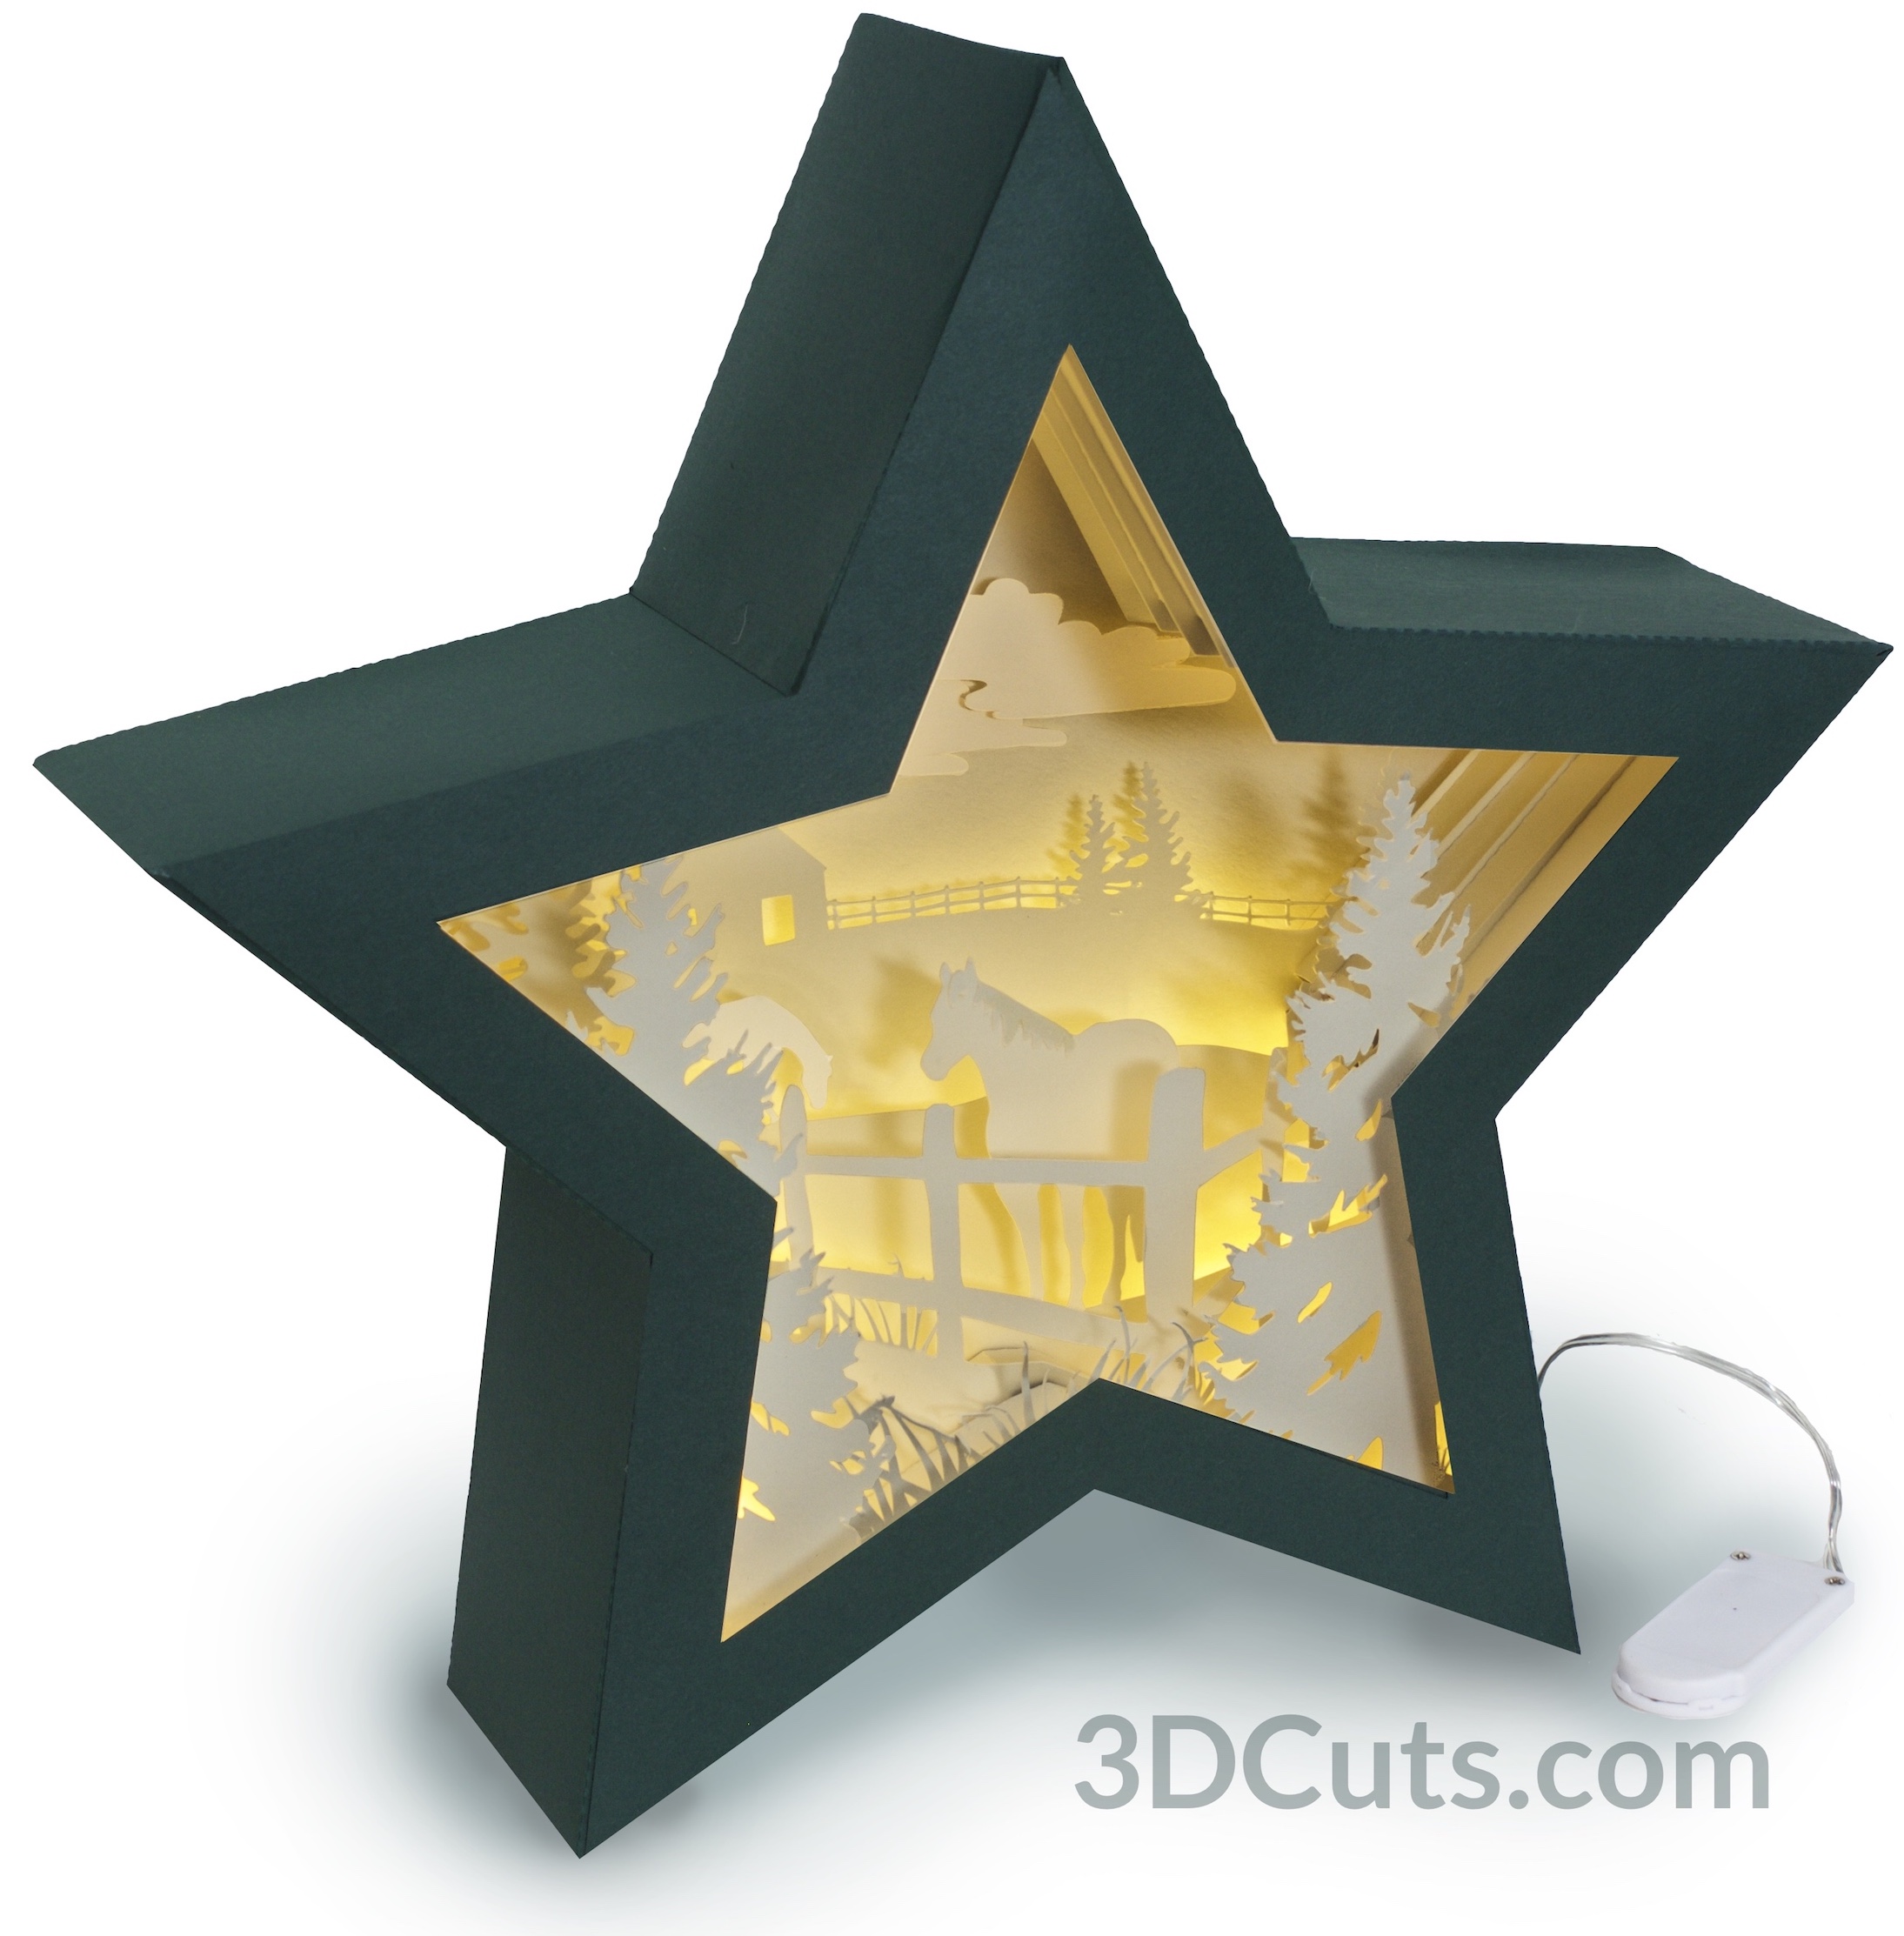
Make a stunning illuminated shadow box from card stock. This tutorial follows me assembling the 2018 Heart Tree Star Shadow Box but the steps are the same for other star shadow boxes I have designed including the Deer in Forest and Horses in the Pasture shadow boxes. This project uses card stock and mid-level construction techniques to assemble the 11" tall x 3" deep shadow box. It includes 5 internal layers and locations for optional LED fairy lights to provide a back glow in the sky. It is perfect for mantle, shelf or hall table.
Download cutting file here at 3DCuts.com:
Note: This tutorial is not for the Star Nativity Shadow Box.

Supplies Needed:
- Cutting File available here from 3dcuts.com.
- 12 x 12" card stock 9 pieces needed for star frame
- 12 x 12" card stock - 7 light colored card stock for interior layers (ivory or white)
- 8.5 x 11 card stock - 5 matching color to interior for side supports (ivory or white)
- Tape Adhesive - I used Scor-Tape (1/4 and 1/2")(Link below)
- Liquid adhesive
- String of 20-24 LED fairy lights- battery operated (optional)- Link below
- Scotch Tape
- Foam Pop Dots
- Binder Clips
Parts Sizes: (need for dxf files)
- Star Frame Front open- 11.3375" W x 10.7187" H
- Star Frame Back solid - 11.3375" W x 10.7181" H
- Layer 1 - 11.0833" W x 10.4792" H
- Layer 2 - 11.0833" W x 10.4792" H
- Layer 3 - 11.0833" W x 10.4792" H
- Layer 3 support - 6.3681" W x 4.2783" H
- Layer 4 - 11.0833" W x 10.4792" H
- Layer 5 - 11.0833" W x 10.4792" H
- Star Side - 4.0792" W x 8.6403" H
- Side Braces (All) - 3.0754" W x 8.3371" W
- Insert - .45" W x 1.5" H
Links to supplies on Amazon:
- Order from Amazon: Scotch Quick Drying Tacky Glue 4 oz (Affiliate Link)
- Order from Amazon: 3D Pop Dots Square 1/4 inch (Affiliate Link)
- Order from Amazon: LineCo Neutral Ph Adhesive (Affiliate Link)
- Order from Amazon: Art Glitter Glue with metal tip (Affiliate Link)
- Order from Amazon: Premium Silhouette Blade (Affiliate Link)
- Order from Amazon: Scor-Tape 1/4” 3 rolls (Affiliate Link)
- Order from Amazon: CR2032 Lithium Batteries for LED Tea Lights (Affiliate Link)
- Order from Amazon: 6 Pack of 20 Micro LED Fairy Lights in Warm White (Affiliate Link)
Steps for Completing the Star Shadow Box
Special Note: I update the instructions online. Check here for adjustments and additional information. Don't just rely on the pdf file that comes with the download. Learned hints are added to the end of the tutorial.
1. Download the cutting files for your cutting machine here from the 3dcuts.com store.
2. Load the files into your cutting software following the steps for your cutting machine.
3. Prepare the files:.
- For the Silhouette: The SVG files from this site will need to be turned into cutting files. Click here for detailed steps on how to use SVG files on your Silhouette. http://www.3dcuts.com/tutorial-upload-svg-silhouette
- For Cricut Explore: Here is a guide for importing into Cricut Design Space. http://www.3dcuts.com/tutorial-adding-3dcuts-files-to-cricut
- For Brother ScanNCut: The svg files will need to be transferred to files for your particular machine. You can change SVG files to FCM files at http://www.canvasworkspace.com/ or Google "How to import SVG files into a ScanNCut" for links to tutorials.
- Complete the tree: The Heart Tree Shadow Box includes an alphabet on Layer 2. You should ungroup that and move the custom initials onto the tree inside the heart. You can duplicate them if needed. These need to be attached in place depending on the requirements of your choose software. Silhouette people can group. Cricut folks will need to attach.


4. Cut the files.
- There are fine lines. It is best to have a good blade and mat. I use the Premium blade.
- Below is a diagram of all the parts, their names and how many to cut of each. You can also see matching colors. Refer to this chart when installing the layers to make sure you are consistent with left and right.
- Making the Deer in the Forest Shadow Box? Click here for that layout.
- Making the Horses in Pasture Shadow Box? Click here for that layout.
- Hint: There is a lot of cutting for this project. I started by cutting all the parts for the star frame (red below). As I was assembling the star frame I was cutting the side braces (10 times- 2 per page). As I was folding those and applying the Score-Tape, I was cutting the 6 remaining parts. It worked well.

5. Build the star frame:This first video demonstrates the steps for completing the star frame. It is the same for all star shadow boxes.
6. Build the layers insert.
Put the star frame to the side and follow the Part 2 video for building the insert stack. There a several diagrams I created to help with this process and I refer to them in the video.
The first is this side view diagram of the folds of the side bracket and how the various layers will be inserted.
Continue scrolling for additional videos.......

- The second diagram is this one showing the numbers on each segment of the side bracket. These numbers correspond with the numbers I use in the video.
- Also note, each segment that should have Scor-Tape added is marked in pink.

Here is the second video - Part Two - Star Shadow Box Insert:
Each different shadow box has unique prep for the layers.
- Making the Heart in the Tree Shadow Box? The prep of the heart (adding letters) on layer 2 is explained above. Adding the support to Layer 3 is covered in the video below.
- Making the Deer in the Forest Shadow Box? Theres are no special add ons to the layers.
- Making the Horses in Pasture Shadow Box? You need to add the details on the horse. Click here for those details.
7. Add the LED Fairy lights.
8. Part 4 - Star Shadow Box Finishing Up!
Adjustments:
This area is where I make notes on things learned as more people make the shadow boxes. We can learn from each other's hints.
- After the making of the videos I continued to make more shadow boxes and I have adjusted some things. You may or may to want to add these adjustments.
- Covering the gap in the layers. There is a file for a small rectangular insert used to cover the gap in the center of the bottom. For the Heart in Tree Shadow Box I cut 9 of those and used them to cover the gap in the first 3 levels of the bottom but also of the left and right sides. As I was doing the final photographs I found those gaps visually distracting. It was an easy last add-on.
- Here are two other star shadow boxes that are constructed using these same techniques.


©2018 Marji Roy, 3dCuts.com