
Cardinal in the Pines Shadow Box - Tutorial

Project Description
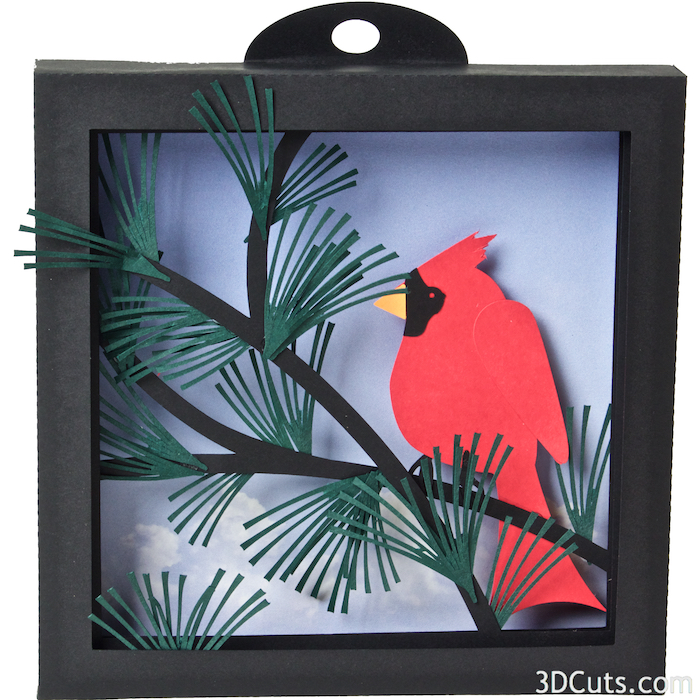
This tutorial is for the 4 layer Cardinal in the Pines shadow box designed by 3Dcuts.com. The process is similar for many of the 4 layer shadow boxes I have designed but I built Cardinal in the Pines as I photographed this tutorial.
This shadow box is about 6 1/4" Square when complete. It comes with an optional hanger if you want to hang it on the wall. It is about 7/8" thick and can also stand on a shelf.
The assembly is easy and basic 3d construction.
- Cutting File available here from 3dcuts.com.
- 8.5 x 11" card stock - I used the 65lb Cardstock from Recollections.
- Each shadow box takes 4 sheets of black, 1 sheet of pine green and 1 sheet for the sky.
- Also small pieces of red and orange are needed.
- Adhesive - I use Scor-Tape, Zig 2-way glue pen, and glue dots although other adhesives would work.
- Scotch tape
- Foam tape
Major Parts Sizes:
- Frame 1 - 8.27" w x 8.27" h
- Hanger - 6.321" w x 1.441" h
- Frame 2 - 7.55" w x 7.55" h
- Frame 3 - 6.91" w x 6.91" h
- Frame 4 - 8.15" w x 8.15" h
Steps for completing the shadow box:

1. Download the cutting files for your cutting machine from the 3dcuts.com store.
2. Load the files into your cutting software following the steps for your cutting machine.
3. Prepare the files:.
- For the Silhouette: The SVG files from this site will need to be turned into cutting files. Click here for detailed steps on how to use SVG files on your Silhouette. http://www.3dcuts.com/tutorial-upload-svg-silhouette
- For the Silhouette files from the Silhouette online design store: This download comes in one long file with cut lines already enabled. You will need to ungroup the file and then copy and paste the parts into separate page sized files to cut. All the text instructions are non cutting items.
- For Cricut Explore: Here is a guide for importing into Cricut Design Space. http://www.3dcuts.com/tutorial-adding-3dcuts-files-to-cricut
4. Cut the files.
- All pieces are cut from card stock.
- For the Cardinal Shadow Box I cut all 4 frames from black. I inserted the sky later using a paper that I had in stock. You could choose to cut layer 4 from a sky blue or white card stock instead of black.
5. Add embellishments to the box frames starting with layer 3.

- Notice there is a cut-out number in the upper left corner of each frame. Use this as a guide. It will help in identifying the layers, identifying front or back, and knowing which corner should be in the upper left.
- I universally design these so that the number is always in the upper left. On some frames it doesn't matter but on others it does. If you always have the number in the upper left as you work you will know you are assembling things correctly.
- The frames are numbered as they will be when complete. Number 1 is the front frame, then 2,and 3 and 4 in the back. You will not assemble them in that order though.
- Start by adding the embellishments. It is easier to do so before the frames are folded. Start with frame 3.
- Locate all the cardinal parts which get applied to frame 3.
- First attach the beak. The orange triangle gets adhered onto of the red beak. I used Zig-2way glue pen with a tiny tip for this portion of the assembly.
- Position so no red shows on the top and bottom.

- Next adhere the black face mask of the cardinal. It gets placed snug up against the orange triangle.
- You might want to take a white pen and add a dab of white to the eye hole at this point (optional),

- Adhere the wing.
- I placed a series of glue dots on the bottom potion because glue dots have a thickness. They keep the wing a little raised from the body which makes the wing line more noticeable in the shadow box.
- I did glue the top of the wind directly to the body with zig glue so that stayed close.

- Next add the feet to the cardinal. One goes in front and one attached to the back.
- Place the bird in front of the branch on layer 3 to understand placement. It should go on the right side but how you position it is flexible. It can lean in or stand straighter. It impacts how you adhere the feet. So work the two together before adhering the feet. You want them to align with the branch.
- Once you know placement, use Zig glue to glue the feet in place.
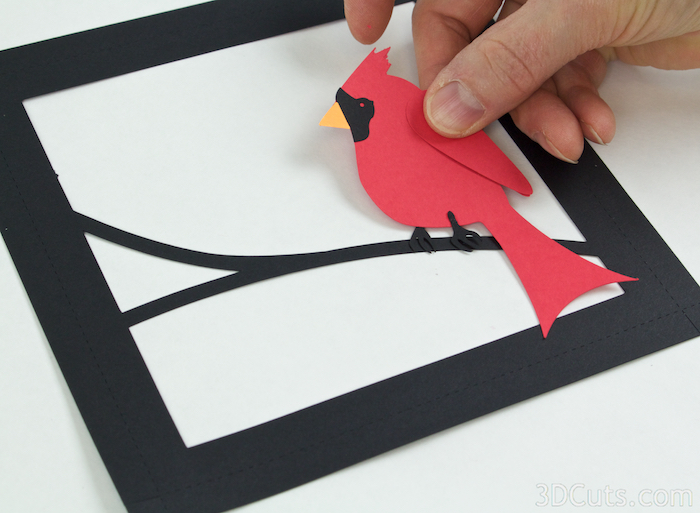
- Attach the cardinal to the branch.
- The tail will go behind the branch and the feet will go in front. I positioned the bird, then drew a light line with pencil on the tail indicating where the branch would cross. I then added glue dots to the front of the bird tail at the spot the branch would cover, and attached that to the back of the branch.
- I then added light touches of Zig Glue to the back of the feet and adhered those to the branch front.

- Add pine bunches.
- The placement of the pine branches is in small groups of 2 or 3 together alternating along the branch. Some are placed on the front and some on the back. I used glue dots to adhere them in place.


- The photo above shows my arrangement but it is up to the artist. Place layer 2 in front of layer 3 as you are placing the pine needles. Layer 2 will have additional pine needles and it is easy to get too many clustered in areas.

- Use the same technique to add pine branches to the front and back of layer 2. Pay attention to your placement on layer 3 so that you don't make some areas too crowded and others empty.
- Leave a few of the pine needles extending over the edge of layer 2 so they can pop out of the frame once all layers are put together.

6. Assemble all four frames.
- For frames 1-2-3 the edges all get folded BACK along the dotted fold lines.
- Make nice crisp folds.
- Frame one is the outside frame and it holds all the others in place. Its corners will be visible so be neat and use a good strong glue for its 4 corners. I used Scor-Tape placing 2 strips on each corner tab.
- Be sure to make good square corners because the fit on the layers is close.
- Layers 2 and 3 are held in place by layers 1 and 4 so you can just use 1 glue dot in each corner to form the frames.


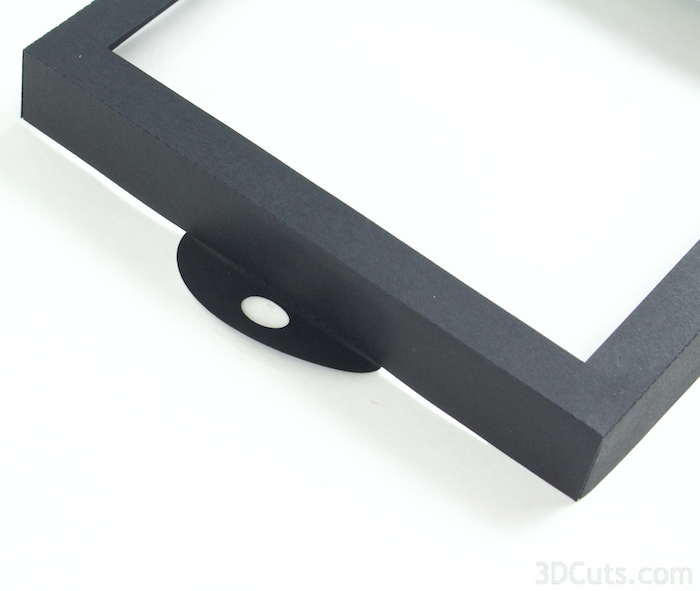
- The optional hanger gets adhered to the inside upper edge of frame 1 before you attach frame 1 to frame 2-4.
- Apply Scor-Tape on the inside edge of the hanger.
- Fold the hanger tab on the dotted score line.
- Place the hanger inside of the top edge of frame 1 and press in place. Be sure to center it.
- Fold the sides of layer 4 TOWARD you (the opposite direction from layers 1-2-3).
- Adhere all the corner seams to create the shadow box.

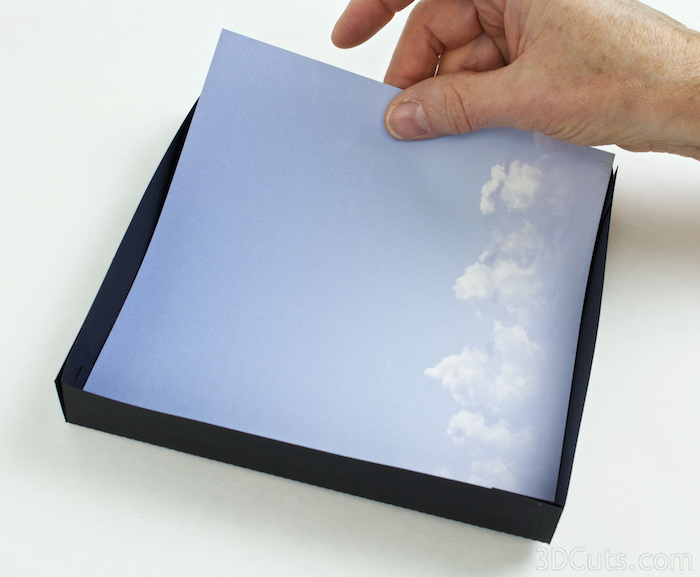
- How you treat the background to your shadow box is flexible. I had nice sky paper so cut a piece of that to 6 1/8" square and glued that in place using spray adhesive.
- You can use a solid light blue or a photo of a sky. You could also use a snowy sky. Be creative here!
- There are a variety of sky backgrounds for you to print available in my shadow box store for your use in many of my shadow boxes. http://3dcuts.com/shadow-boxes-nature-themes
- All 4 frames should now be complete.

6. Combine the frames.
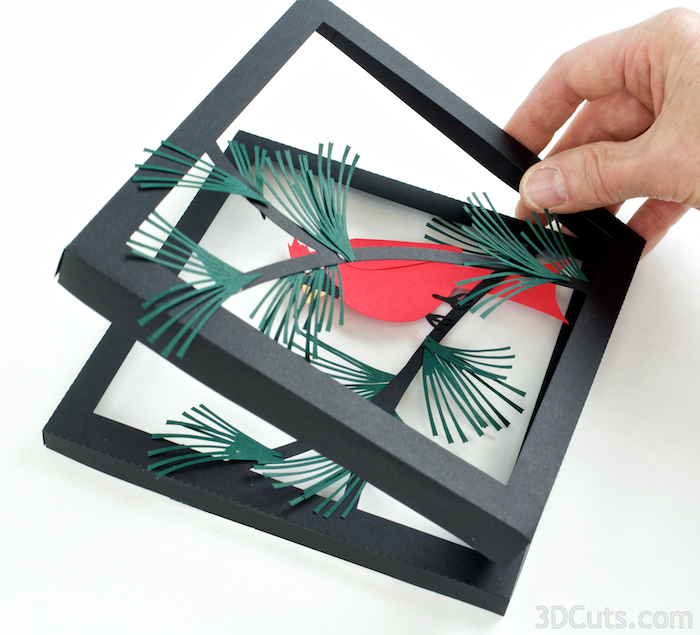
- Frame 2 gets placed over frame 3 with their back edges lining up.
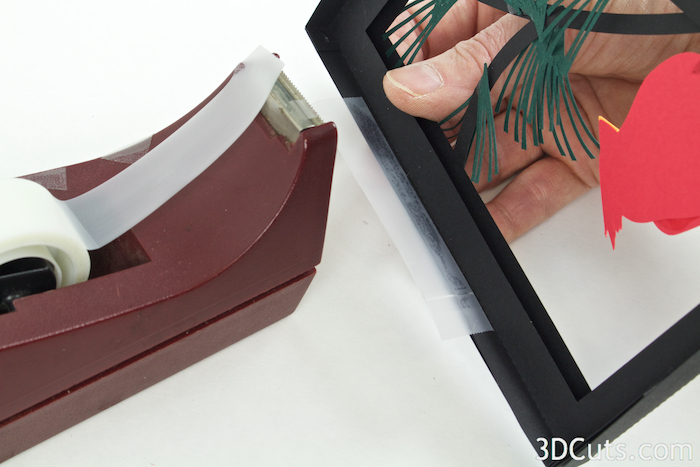
- Use scotch tape to attach frame 2 and frame 3 together. This keeps the spacing of the layers in place.
- Flip them over. aligned the back edges of one side and apply a piece of scotch tape to the center.
- Fold it over the edge adhering the back edges together being careful to keep back edges aligned.
- Cut off any extra tape.
- Repeat this on all four sides.

- The cardinal is going to need extra support. I add it by sticking a stack of foam tape to the back center of the bird.
- I used 4 layers, one on top of the other.
- I peeled off the backing so the cardinal could stick to the back of the shadow box once frames 2 and 3 were placed in frame 4.

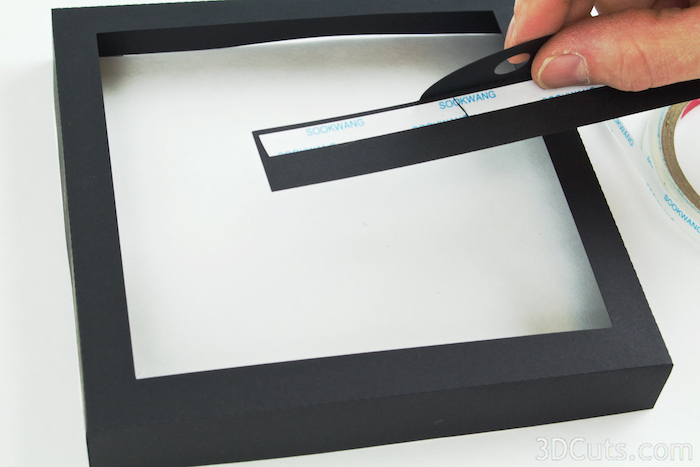
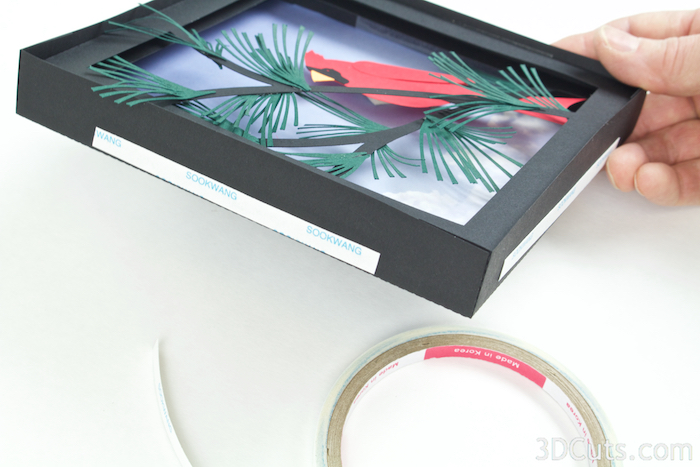
- Place a strip of Scor-tape about 3" long on all 4 sides of Frame 2.
- This should be placed near the front edge and in the center as shown.
- Leave the backing in place.
- Do this on all 4 sides.

- Slide frames 2 and 3 into frame 4.
- Slide it all the way to the back.
- Press the cardinal with foam squares to the back so it has added support.

- Using tweezers, reach into the seam and grab the backing of the score-tape.
- Pull it out and adhere the side of frame 2 and 3 to the inside of frame 4.
- Repeat this on all 4 sides.

- Adhere Frame 1 to the combined frames 2-4.
- First apply a 3" strip of Score-Tape to the outside of each side of frame 4 leaving the tape backing in place.
- Place on the back edge and near the center as shown.
- Do this on all 4 sides.
- Place frame 1 over frame 4.
- Use tweezers to reach into each side seam and remove the backing to the 4 pieces of Scor-tape and press each side in place.
- Pluck the pine needles near the edges to the front and add a few more. I added some to the inside of frame 1 in the lower left corner.

Done! Time to admire your handy work.

If you enjoyed making this shadow box visit my page of nature inspired shadow boxes for many additional files from all the seasons. http://3dcuts.com/shadow-boxes-nature-themes