
3D Puzzle Box Tutorial
Project Description
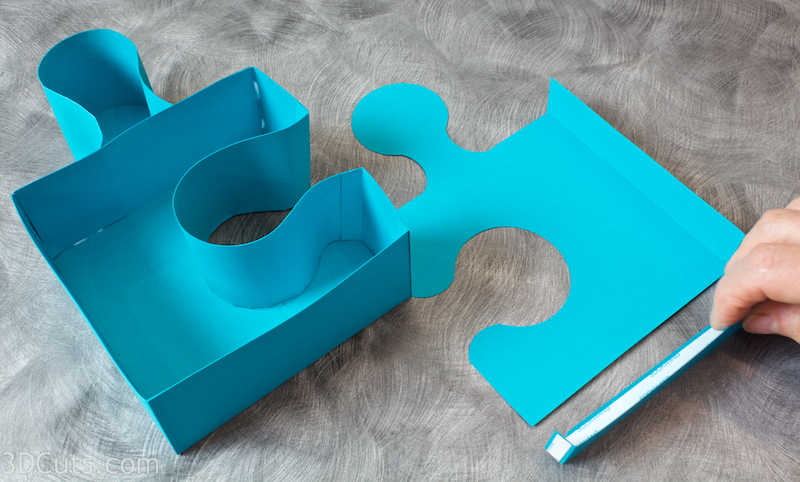
Here is a unique 3d box construction file. The covered box is shaped like a classic puzzle piece. It is designed so that it can nest into multiples of itself. If you make more than one, they will fit together. The file includes the base and the cover. Each completed piece is about 5" x 7.5" x 2". It is perfect as an interesting box to give a small gift or gift card, or as a bright decor item for a child room's room, or for a puzzle lover. It also can be used for Autism awareness events.
Download cutting file here at 3DCuts.com:

Supplies Needed:

- Cutting File available herefrom 3dcuts.com.
- 8.5 x 11" card stock - 4 pieces for each piece
- Adhesive - I used Scor-Tape (1/4")(Link below)
- Allene's Spray Adhesive (Link below)
Parts Sizes: (need for dxf files)
- Puzzle Bottom: 7.3559" w X 4.6457" h
- Bottom Long Side: 5.0635" w X 2.3793" h
- Bottom Short side 1: 1.8781" w X 2.378" h
- Bottom Side 2: 2.003" w X 2.378" h
- Bottom Long Side: 5.0635' w X 2.378 " h
- Bottom Zig-Zag Shorter: 7.3574" w X 2.3992" h
- Bottom Zig-Zag Longer: 7.5438" w X 2.3748" h
- Bottom Inner Brace: 4.5664" w X 2.0132" h
- Puzzle Top: 7.4385"w X 4.7634" h
- Top Long side: 5.142" w X 1.3626" h
- Top Short Side: 1.9169" w x 1.3684" h
- Top Zig-Zag: 7.4238" w x 1.375" h
Order from Amazon: Aleene's Tacky Spray Adhesive (Affiliate Link)
Order from Amazon: Scor-Tape 1/4" X 27yds (5 Rolls) (Affiliate Link)
Steps for Completing the 3D Puzzle Box

1. Download the cutting files for your cutting machine herefrom the 3dcuts.com store.
2. Load the files into your cutting software following the steps for your cutting machine.
3. Prepare the files:.
- For the Silhouette: The SVG files from this site will need to be turned into cutting files. Click here for detailed steps on how to use SVG files on your Silhouette. http://www.3dcuts.com/tutorial-upload-svg-silhouette
- For the Silhouette files from the Silhouette online design store: This download comes in one long file with cut lines already enabled. You will need to ungroup the file and then copy and paste the parts into separate page sized files to cut. All the text instructions are non cutting items and guide in the number of copies you need for each piece.
- For Cricut Explore: Here is a guide for importing into Cricut Design Space. http://www.3dcuts.com/tutorial-adding-3dcuts-files-to-cricut
- For Brother ScanNCut: The svg files will need to be transferred to files for your particular machine. You can change SVG files to FCM files at http://www.canvasworkspace.com/ or Google "How to import SVG files into a ScanNCut" for links to tutorials.
4. Cut the files.
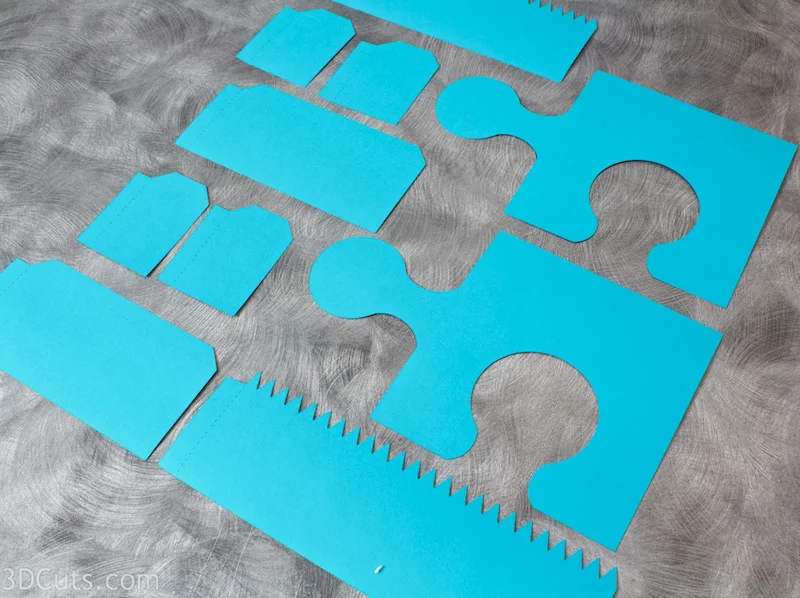
- Below is a diagram of all the parts, their names and how many to cut of each. You can also see matching colors. Refer to this chart when installing the layers to make sure you are consistent with left and right.
- As you cut the files be sure to keep the box tops and bottoms separate. They are very similar but slightly different.

3D Puzzle Box in card stock by Marji Roy of 3dcuts.com. SVG, PDF, PNG and DXF cutting files and a complete tutorial available.
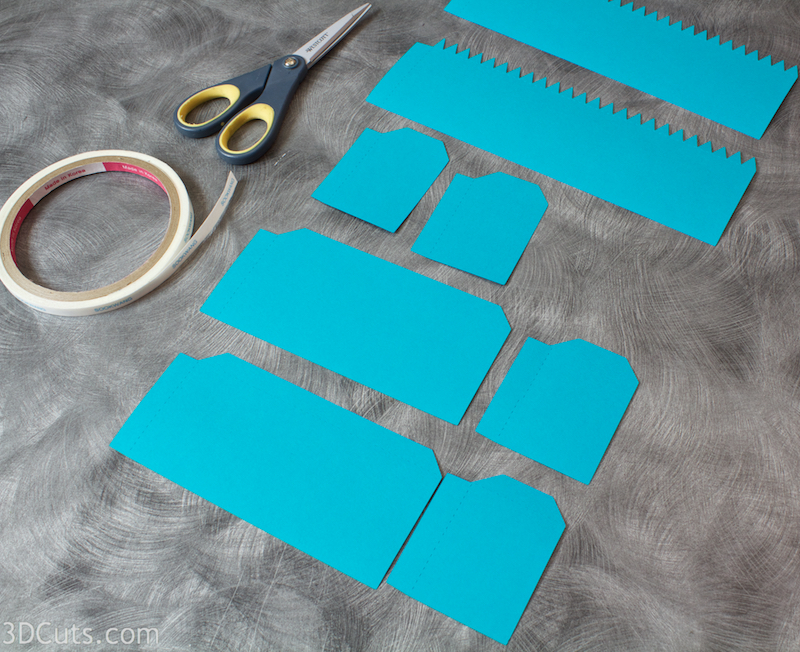
5. Construct the box bottom. Prep the parts.
- Locate the 8 pieces for the side walls of the box bottom. These are pictured. Notice each has 2 tabs- one with squared off corners and one with angled ends. The square ones will connect the sides to each other and the angle ones will connect the sides to the box bottom.
- Arrange them so all the square tabs are up and the angled tabs are to the right. It is easy to get mixed up and put adhesive on the wrong side.
- Apply Scor-Tape to the rectangle tab on each of the 8 side pieces. Make sure that you get the correct side. If the angle tab is to the right and the rectangle tab is on top, place the Scar-Tape on the up side of all 8 pieces. Leave the backing in place until instructed to adhere.
- Note: I like using Scor-Tape because it is strong and it allows me to keep my fingers clean as I work. It also allows me to prep pieces in advance and then peel the backing as needed. You certainly can make these using other types of adhesive but you will need to adjust steps and only put adhesive on as you place each piece.
- Flip all 8 pieces over and apply Scor-Tape to the angled tabs. This is the opposite side of the rectangle tabs.
- Notice on the 2 longest pieces I applied the Scor-Tape in one piece over all of the zip-zag tabs. I did this so I can peel it off in one pull when the time comes. It saves time.
- Again, leave the backing in place.

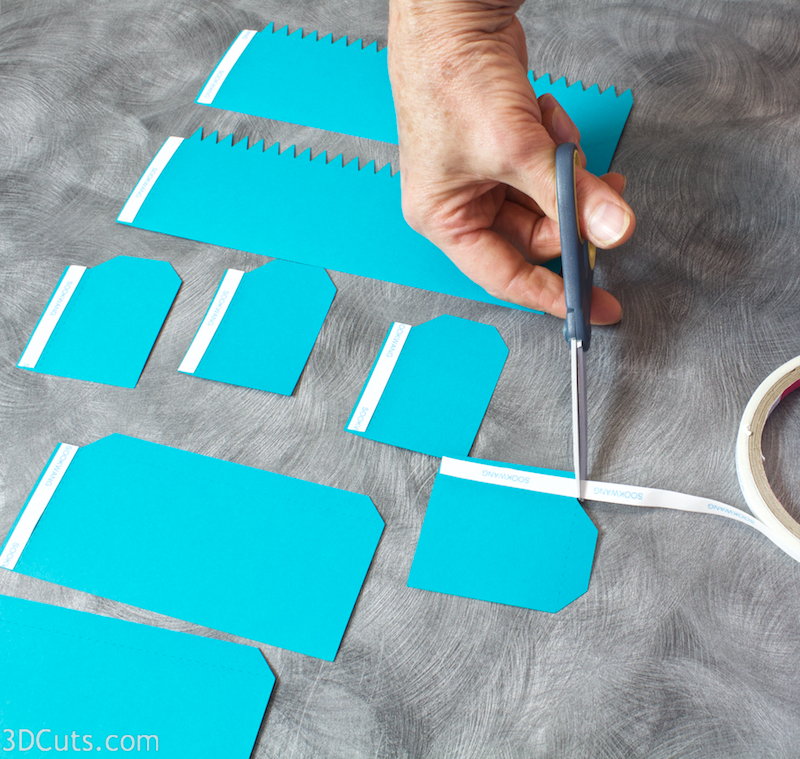
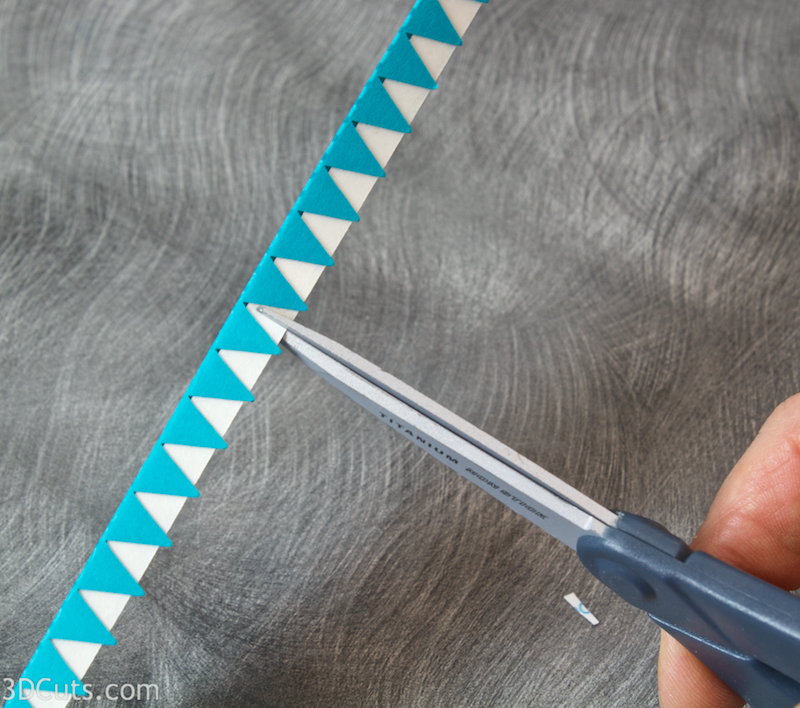
- Use scissors and snip into each notch on the long pieces. Do not cut the card stock, only the Scor-Tape. Try to not cut all the way to the edge of the Scor-Tape but leave a small connection so it will peel in one move.

- Fold and crease on all the dotted score lines. The angled tabs all get folded toward the Scor-Tape. The rectangle tabs get folded in the same direction as the angled tabs. Two have to go in the opposite direction but you'll do that when you place them. Just folding them all ahead is easier.

6. Construct the bottom. Assembly steps.
- Take one of the bottom puzzle pieces. (The bottoms are slightly smaller than the tops.)
- You can start anywhere but I started with one of the long straight sides. Peel the backing from the Scor-Tape and adhere it to the long straight side. Both long sides are the same size and the pieces are interchangeable.
- On all seams you want to carefully line the edge up to the dotted line and keep things square.
- Important note: On you first one it doesn't matter which direction things go. After that it does if you want the puzzle pieces to fit together. It must match the others.

- There are 4 short side pieces. On the bottom, two are slightly larger than the other two. The large two go on either side of the knob. The smaller two go on either side of the notch.
- Select one of the larger ones.
- Peel the backing off the rectangle side tab and adhere it first to the long side forming a nice square corner.
- Then peel the backing off the angle tab and adhere that to the bottom.


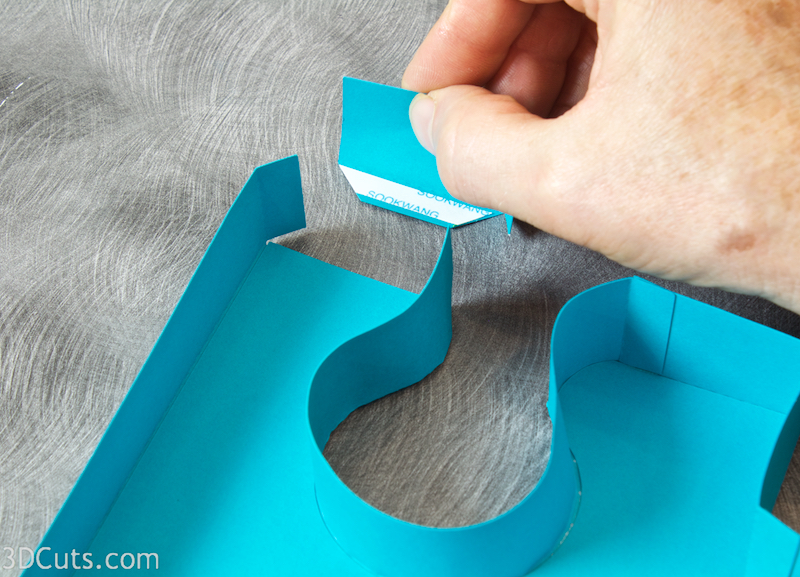
- On the box bottom the two sides with zip-zag tabs are slightly different. The shorter of the two goes around the knob.
- Pull the card stock over the edge of your work surface to give the shape a little curl in the direction you will want it to bend. I did both ends one direction and the middle the opposite matching the shape of the knob.

- Adhere the rectangle end tab to the previous side.

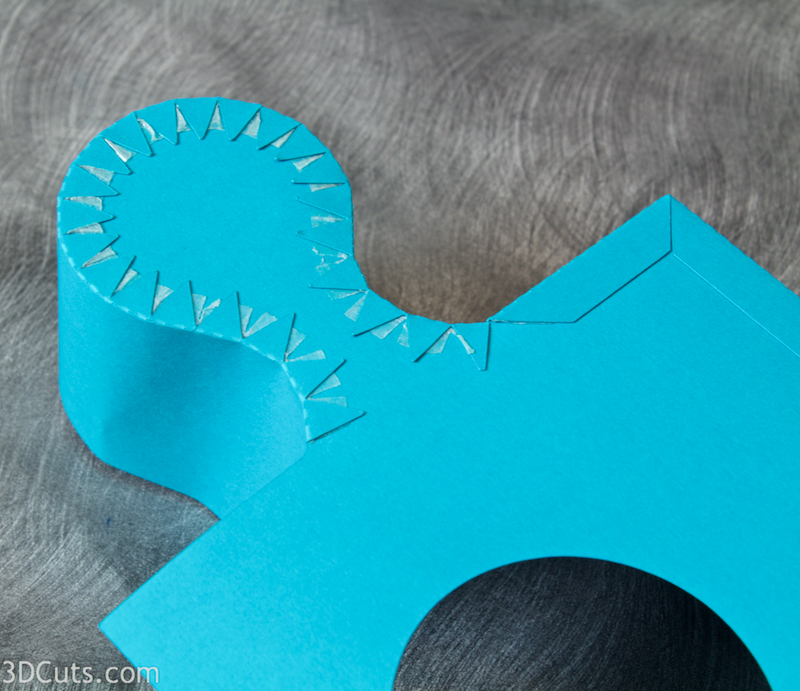
- Peel the backing off the zig zag tabs. If you cut it properly it will come off in one piece. If not, take off the pieces as you work your way around the knob.

- Adhere each of the little triangle tabs to the bottom. Be very careful that it is snug up against the edge of the bottom before adhering. Placement is very important.
- Carefully work your way around the knob gluing each tab down.


- The complete knob will be nice and round. Using your fingers, help train the card stock on the open edge into place. You will need to curl the card stock some so it forms the knob shape on the open side.
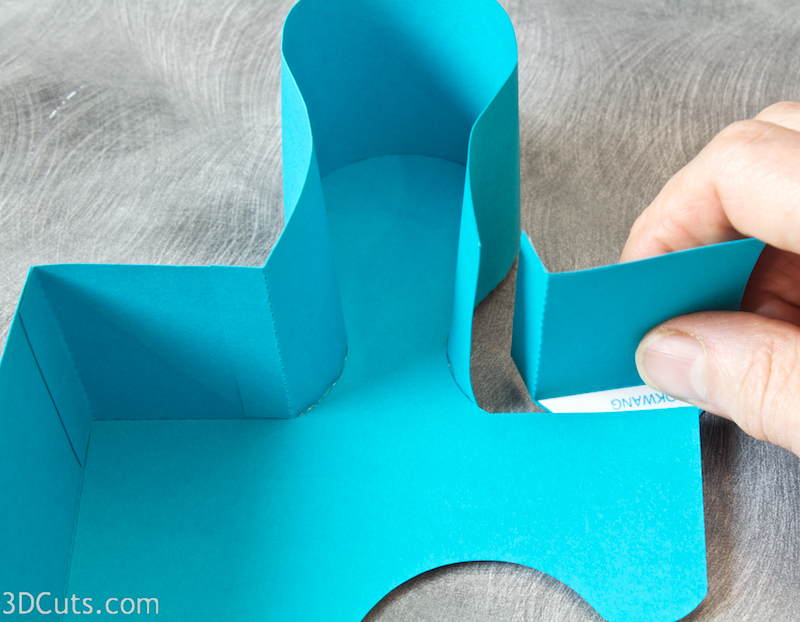
- Add the next side piece (the other slightly larger one.) The tabs always go on the inside even though this image looks like I am getting ready to attach it to the outside. I didn't!
- Attache both the rectangular side tab and the angled bottom tab.
- Add one of the smaller side tabs as you proceed around the corner.
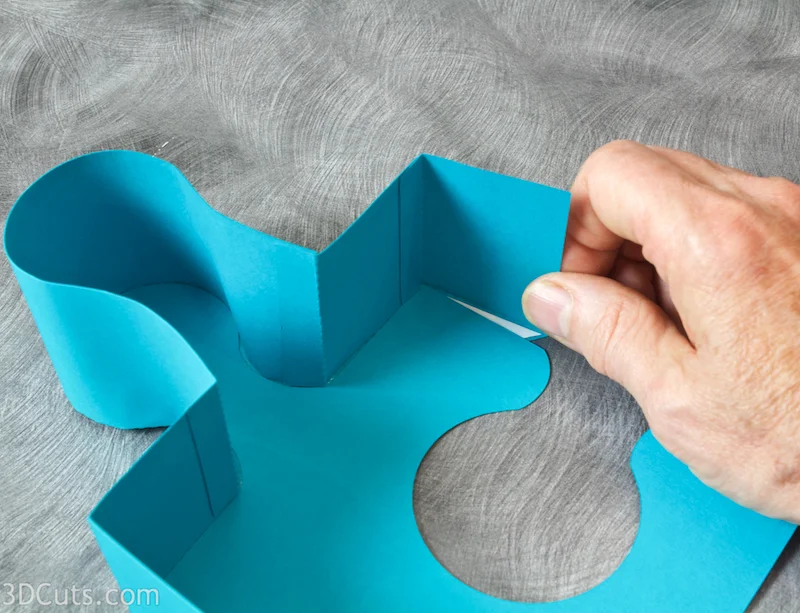
- Time to add the longer of the two zig zag pieces. Remember to curl the ends and middle by pulling over the edge of your table. (I hadn't done it yet in this photo.)

Adhere the corner and then work your way around the notch again working to adhere each triangle tight up against the edge.


- Finger train the card stock on the open edge to reflect the same curve.

- Adhere the last small side piece to both the side and the bottom.

- Adhere the last side piece, gluing in both sides and the bottom.

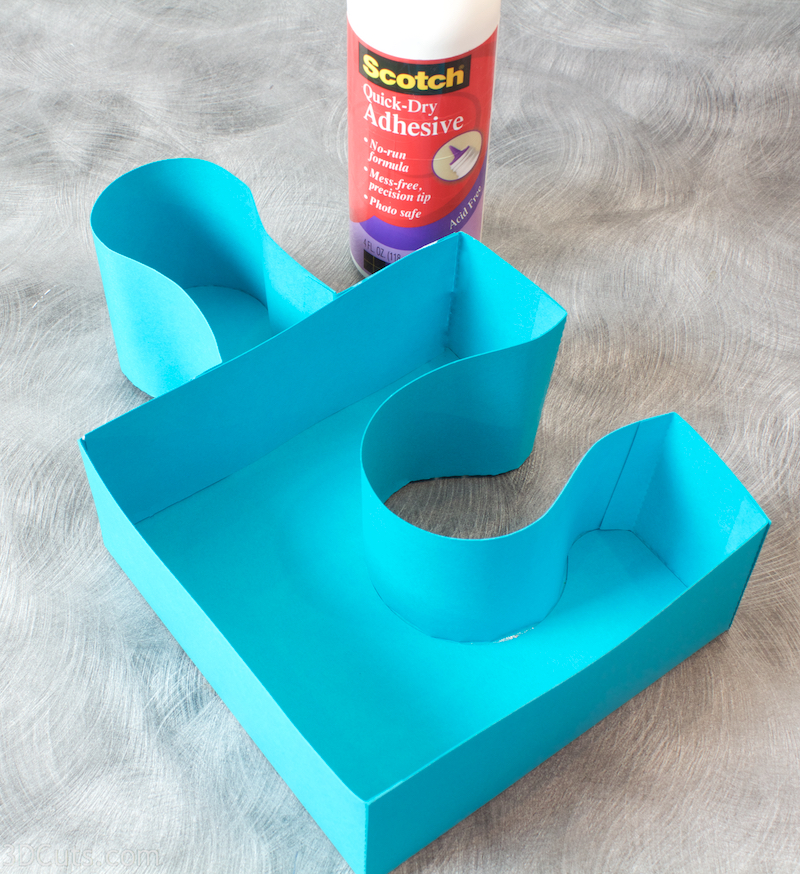
- Here is the bottom of the puzzle piece with all the sides adhered.

- The bottom has an internal support across the base of the knob. This helps hold it square.
- Apply adhesive to the two areas shown.
- Place the bottom bracket inside and press in place working to keep everything square.
- The bottom is assembled. Put that to the side and move on to the top.

7. Assemble the cover.
- The cover is similar to the bottom only it is slightly larger, and it is only 1" tall instead of 2.
- The knob and notch are closer to the same size so there isn't a difference in the sizes of the side parts like there was in the bottom. Make sure you cut the correct number of pieces.

- Position all the parts so the rectangular tab is at the top and the angle one sticks out to the right.

- Apply Scor-Tape to all the rectangular tabs on one side.
- Flip them all over and apply Scor-Tape to the angular tabs on the other side- just like you did on the bottom.
- Cover the Zig-Zag tape with 1 piece just like you did on the bottom.


- Fold on all the dotted score lines just like you did for the bottom.

- Cut little slits in the Scor-Tape in all the notches of the zig-zag again not going all the way to the opposite edge.
- The side will be applied to the cover piece in the opposite direction from the bottom. They will go down from the front, where as the bottom side came up from the back. Make sure you get this correct or else the top will be backwards.

- It doesn't matter which order you put the sides on but all of them get added. I started with the two long edges. I glued them to the top and to each other.
- On the top the size of the knob and the notch are closer so all 4 of the side pieces are the same size.

- Continue around the edge, adding the parts in order. Next comes the zig-zag around the knob. Both are the same sizes.
- Add the next two small edge pieces they wrap around the corner..


- Continue and add the next zig-zag piece into the notch again paying close attention to getting it tight up against the edge.

- Add the last edge piece adhering it on all 3 sides.
- Fit the cover onto the box. Because it is a complex shape it will take a little finger adjusting.

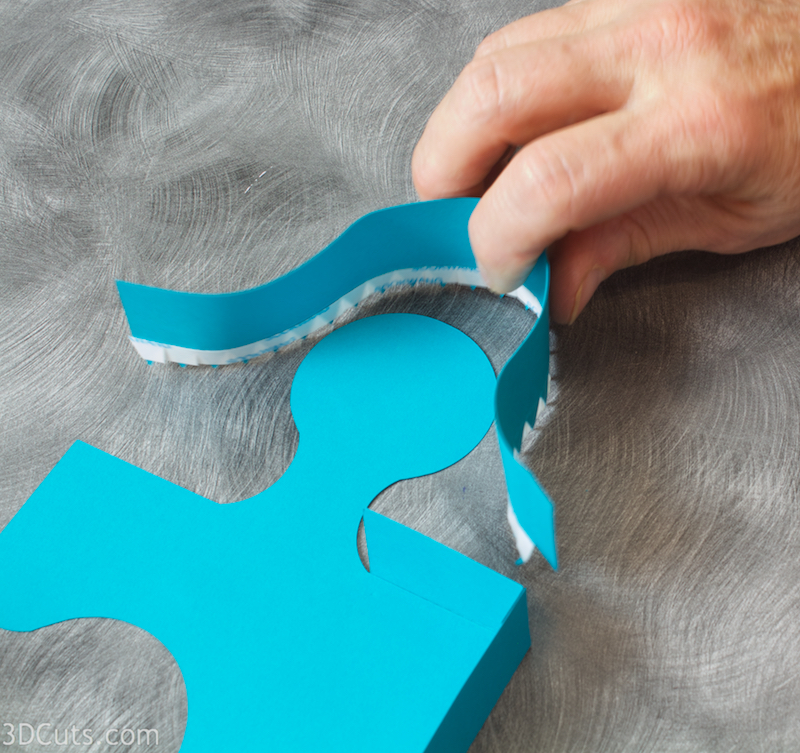
- Both the cover and the bottom have a matching cover glued on to hide all the tabs. Match up the correct pieces and the correct sides before adhering them. They are very close in size with the larger one going on the cover. I used spray adhesive to hold these in place. Aleene's Spray is my preferred because it gives you about 30 seconds of repositioning time.

- The first puzzle piece is complete. How many more will you make? You get much faster on subsequent assemblies!

©2017 Marji Roy, 3dcuts.com